.png?table=block&id=a121a8eb-e744-4819-af3f-4e7022618a37&cache=v2)


Created on 8th May, 2023
What do I cover?
- Creating a Github repository
- Creating A ReadMe file
- Creating A GitIgnore file
- Creating A license
Pre-requisite
- Preferably the Linux or MacOS OS
- If you are using Windows you can use the
git bashtool from https://gitforwindows.org/
Let’s Go!
A Github repository is basically one central location for you to store all the code, config files, text files for your project and then manage them and track changes as and when you keep on updating them or add/delete files. It will have all the historical context of your project so that if the need arises you can get back mistakenly deleted files or lines of code.
It also enables others to collaborate with your project. They can clone your project/ repository and then suggest changes to the project which you can manage centrally from the Github repository.
Let’s create our first Github repository.
1. Create the repository
Login to your Github account from our previous tutorial. Click on the “ + “ on the top left corner of the screen and click “New repository”

You should be provided with the following screen (or something similar when you are reading this):
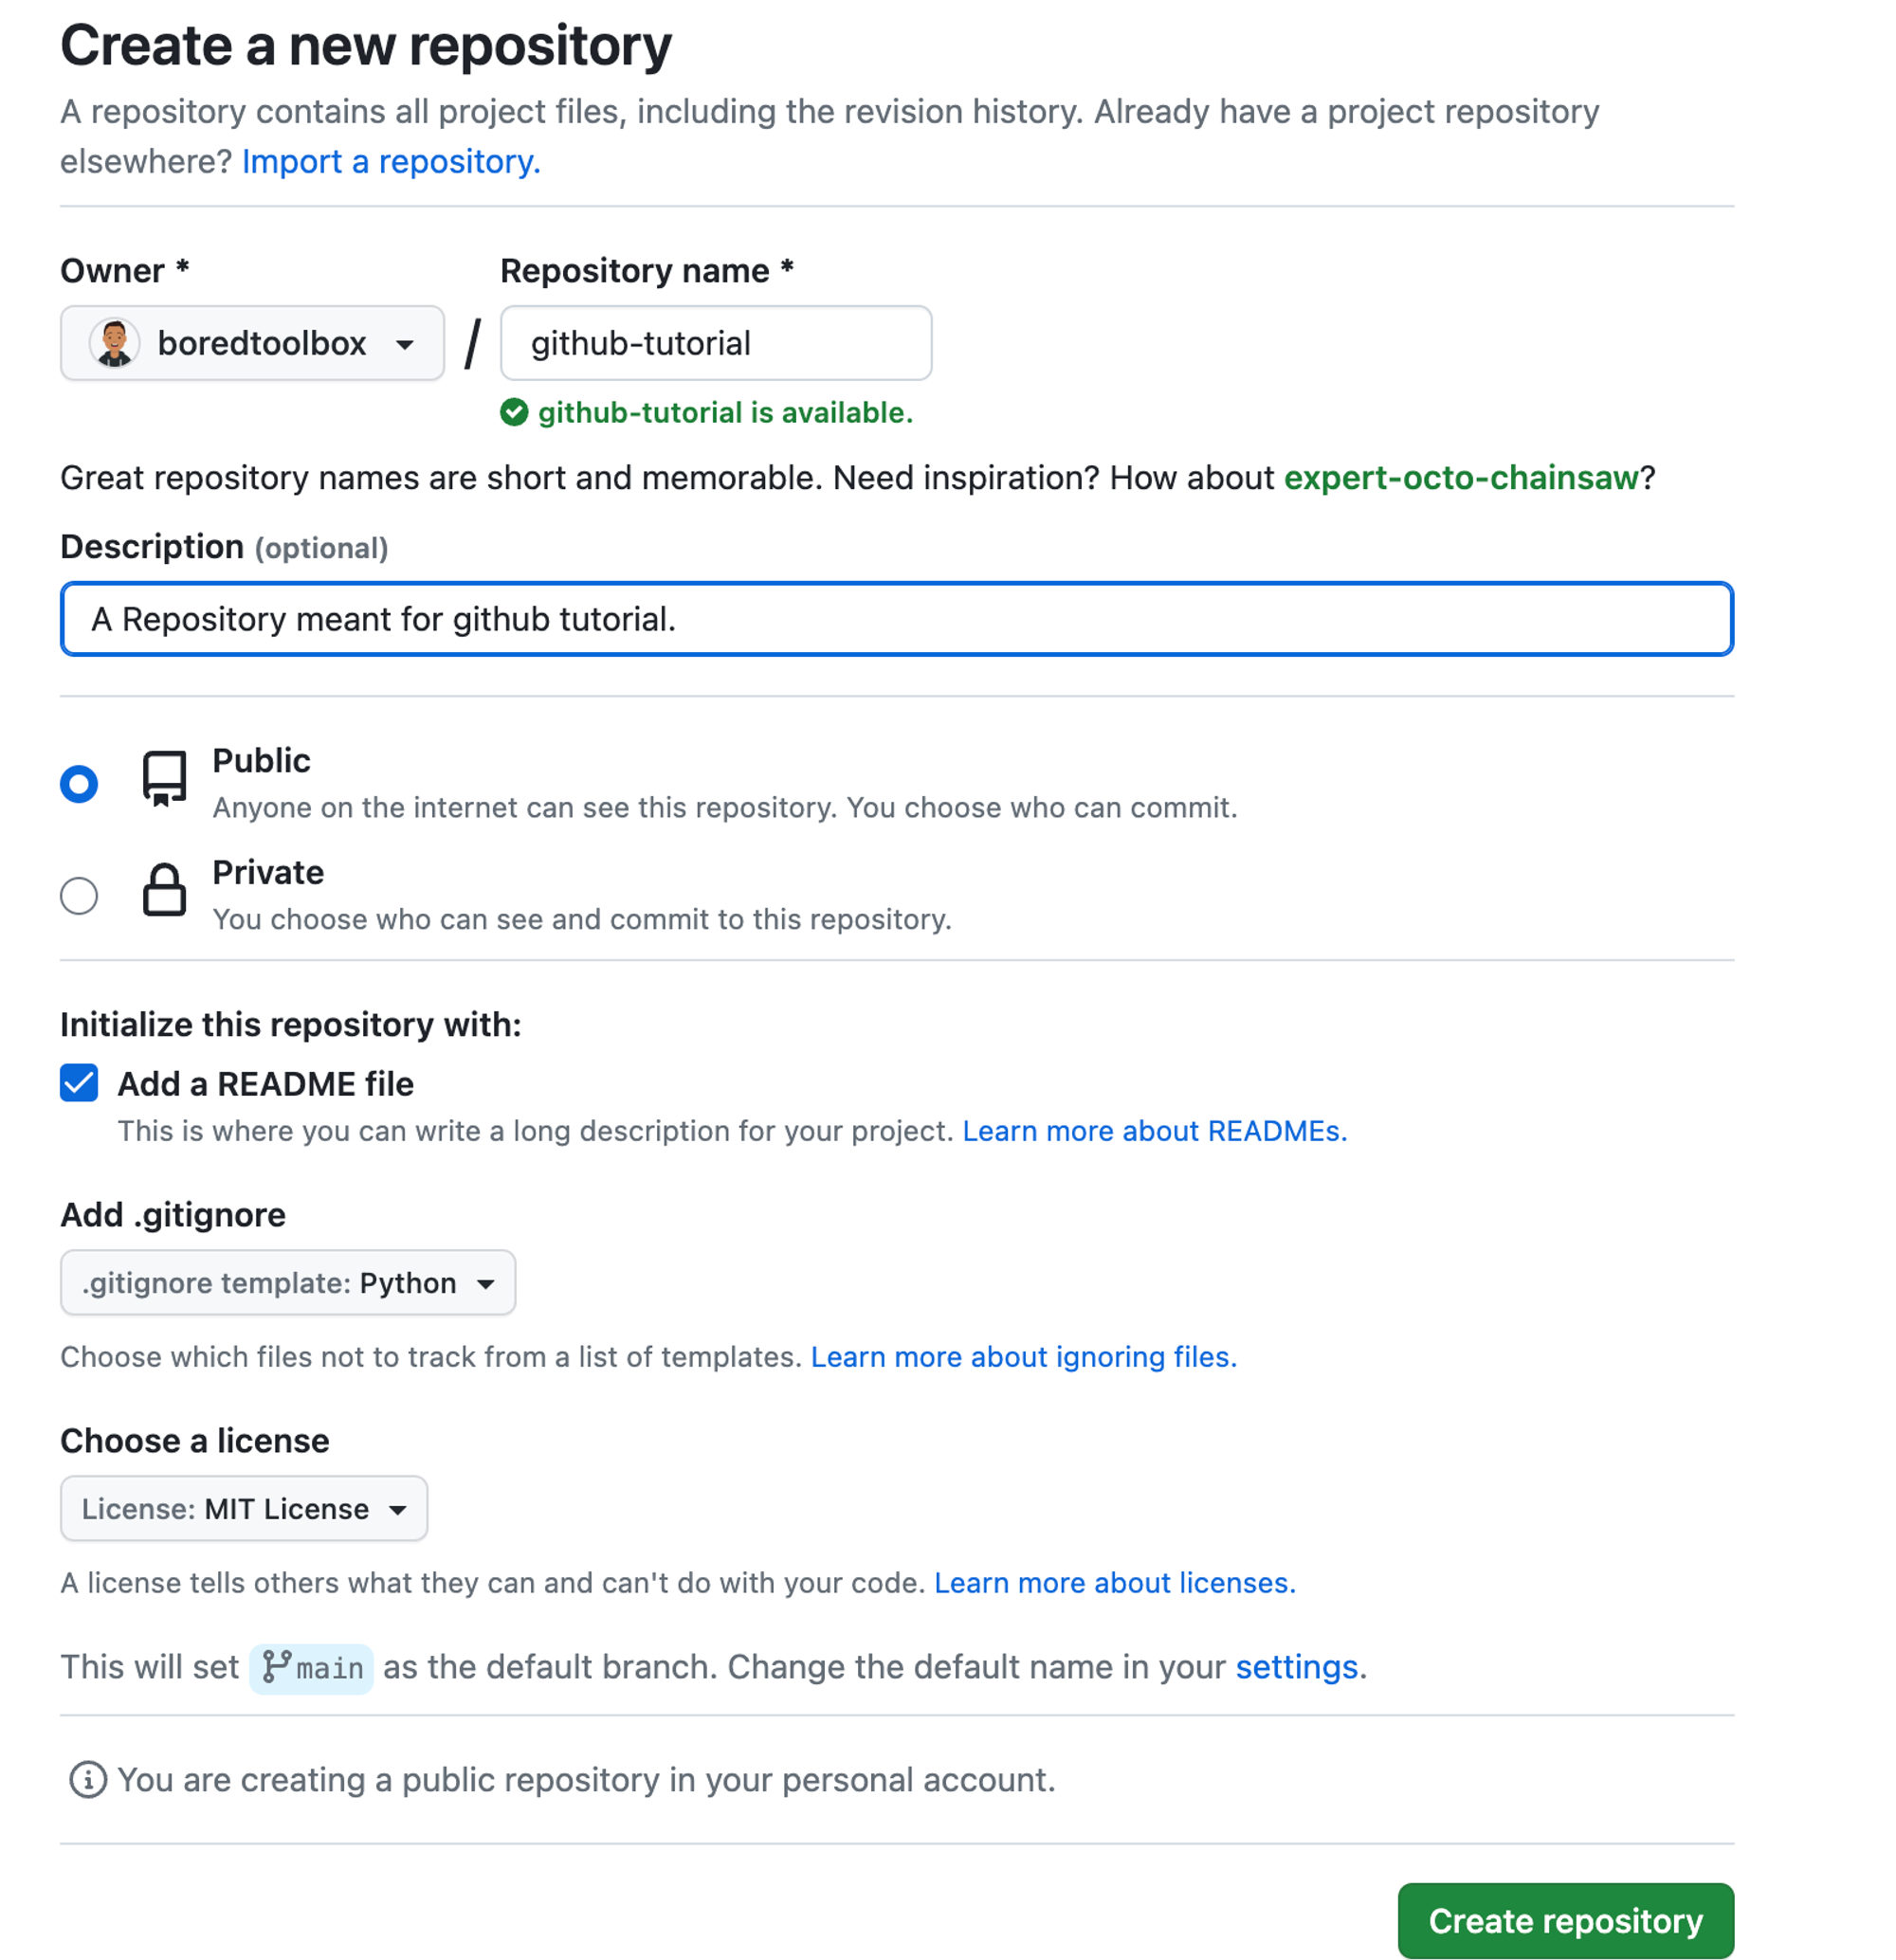
2. Fill up the form
Fill out the form with the information that is required relevant to your project:
- Repository Name [Mandatory]: This is the only mandatory part of the form. Provide a name for your repository. Usually you put the name of your project here. For this example I chose the name
github-tutorial
- Description [Optional]: You can provide a brief description of your project here. For this example I chose to write
A Repository meant for github tutorial.
- Public/Private [Optional]: You can mark your repository public or private here. Private repositories are only accessible and viewable by you, unless you specify collaborators otherwise. But you can add unlimited collaborators on public and private repositories. For this example I chose the option
Public
- Initialize with:
- README (optional)
- .gitignore (optional)
- license (optional)
It is always adviceable to add a readme file to your project. In this file later on you can add more details or instructions regarding your project and how others can use it or maybe collaborate with it. For this tutorial I chose to initialize the project with a
README file.You can choose to create your repository with a .gitignore file. This will tell Git which files and directories to ignore when you make a commit. You can create a
.gitignore specific to the programming language of your project like so: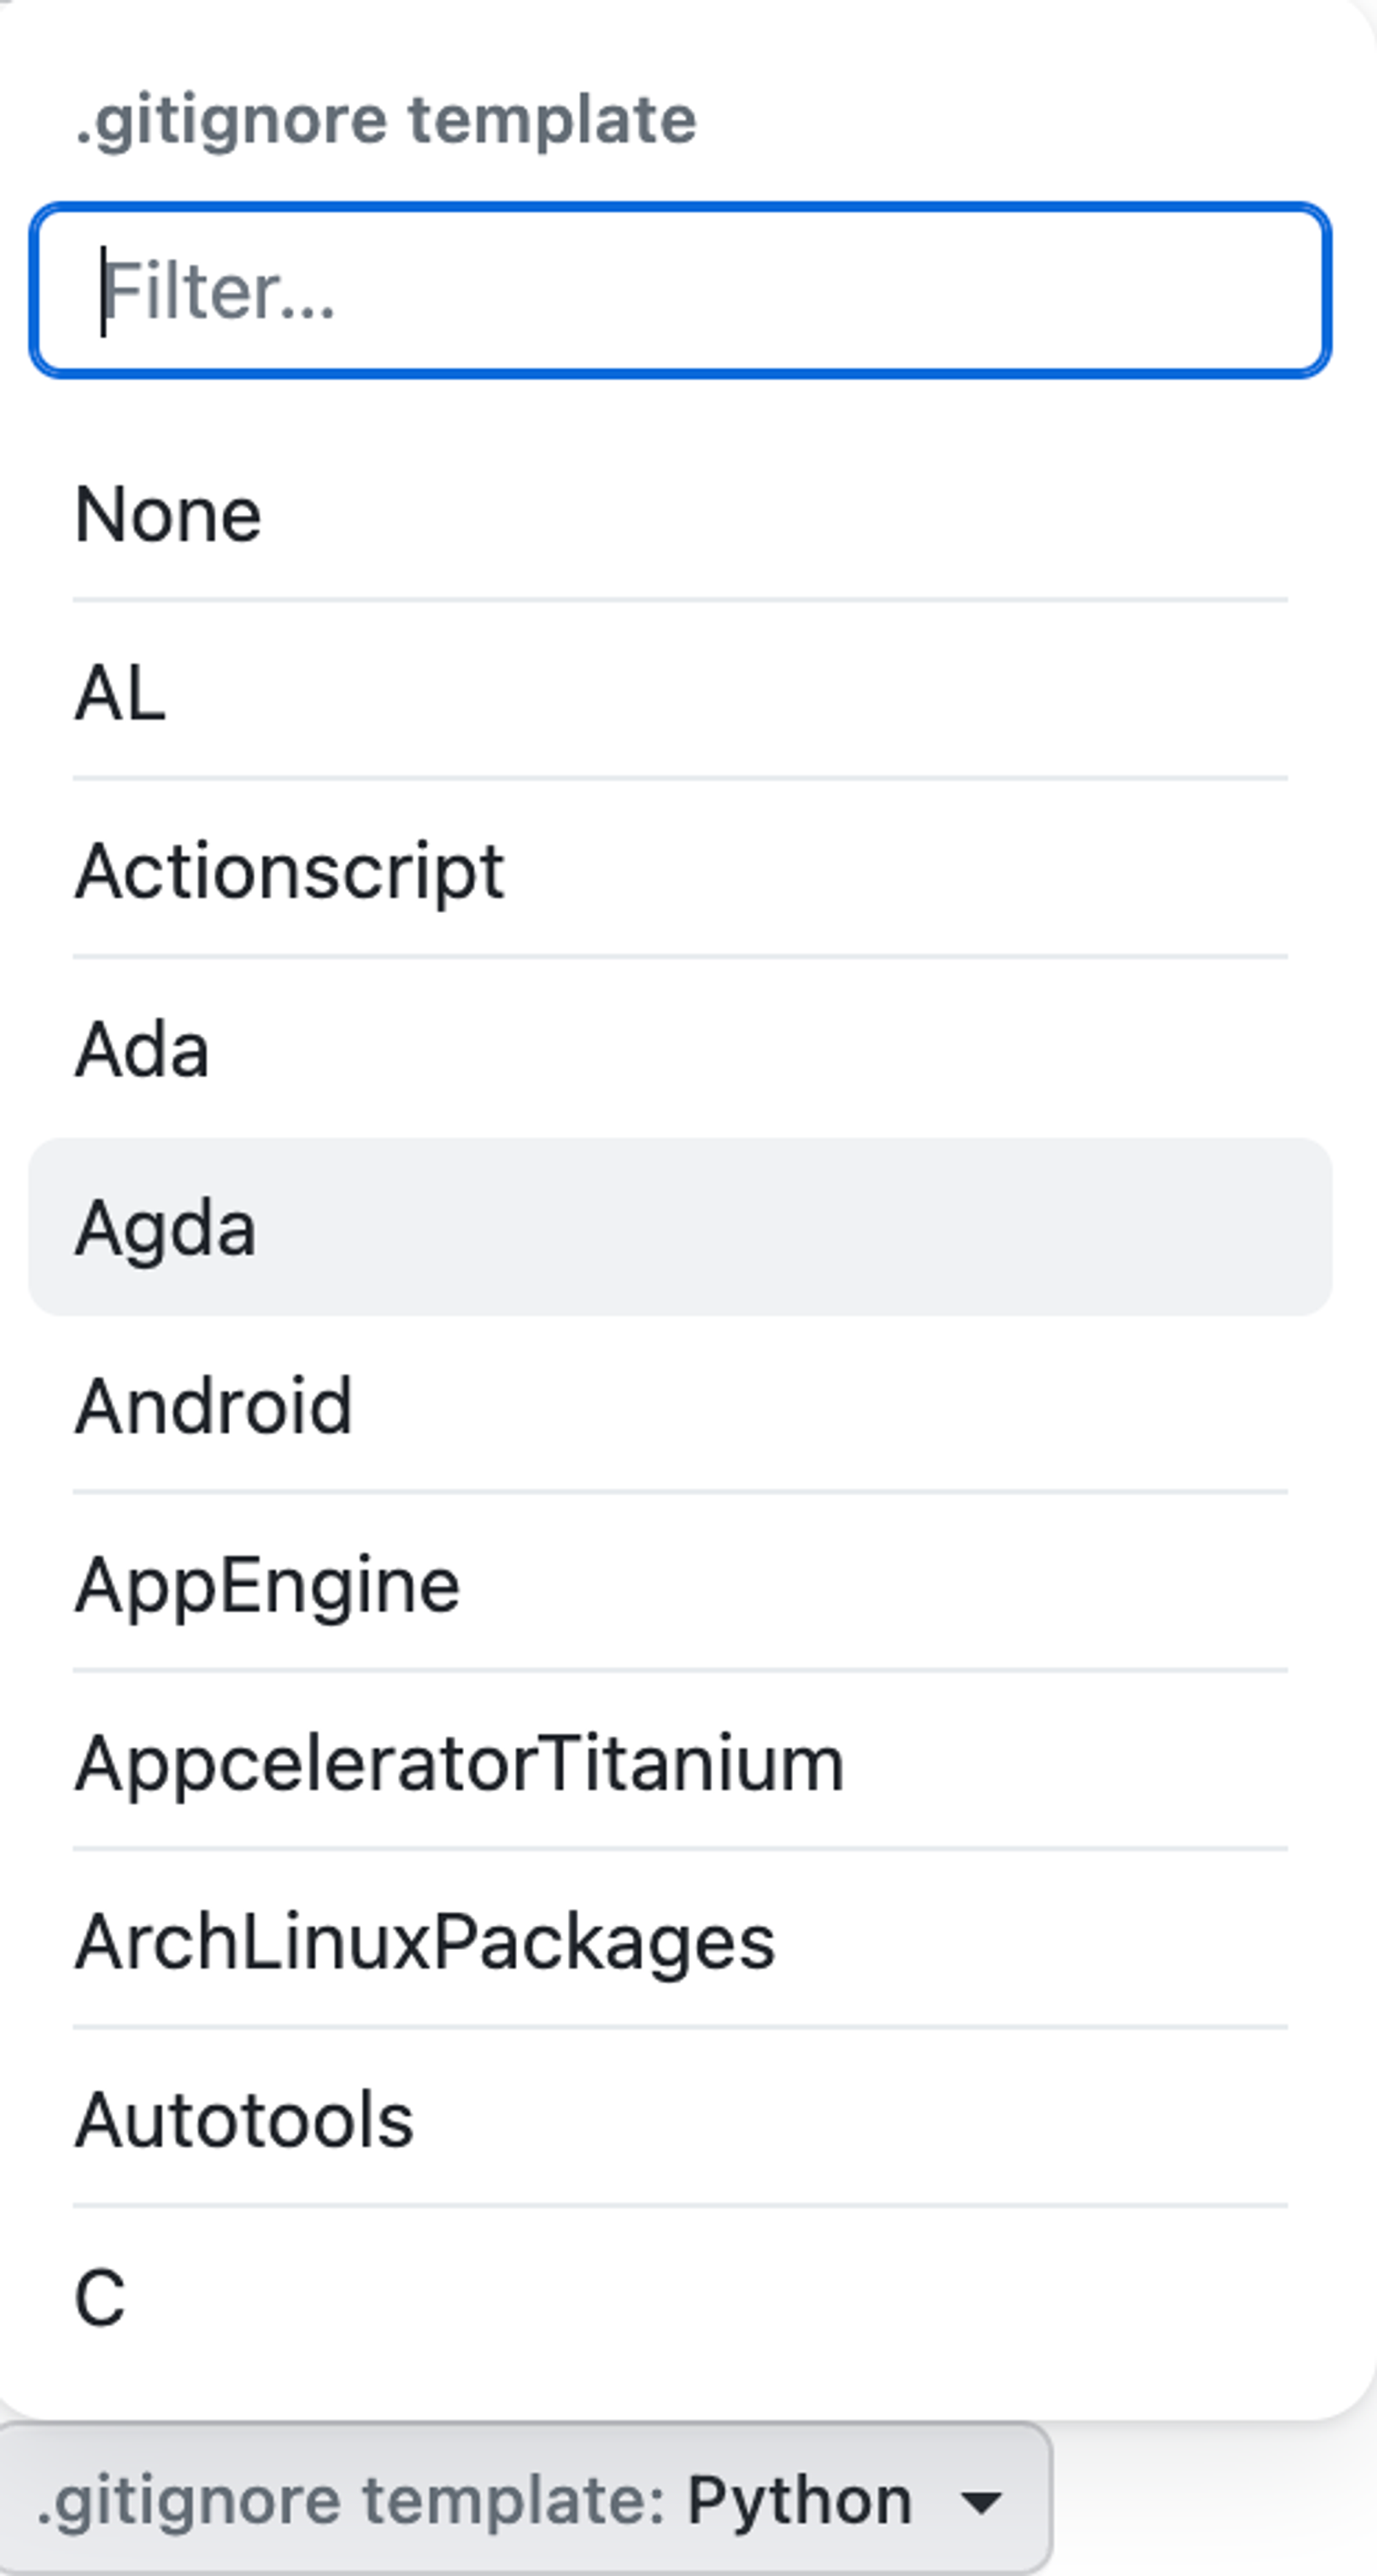
Or you may create an empty
.gitignore file by chosing “None” and then you can fill up according to your wish. Another great place where you can look up sample .gitignore files is https://www.toptal.com/developers/gitignoreFor this tutorial I chose to create a
.gitignore file for the Python programming language.A license tells others what they can and can't do with your code. For example maybe you want that other’s can use your code for private use but not for commercial purposes. Then you would want a license that encomapsses this requirement. You can select any of the options as per your requirement
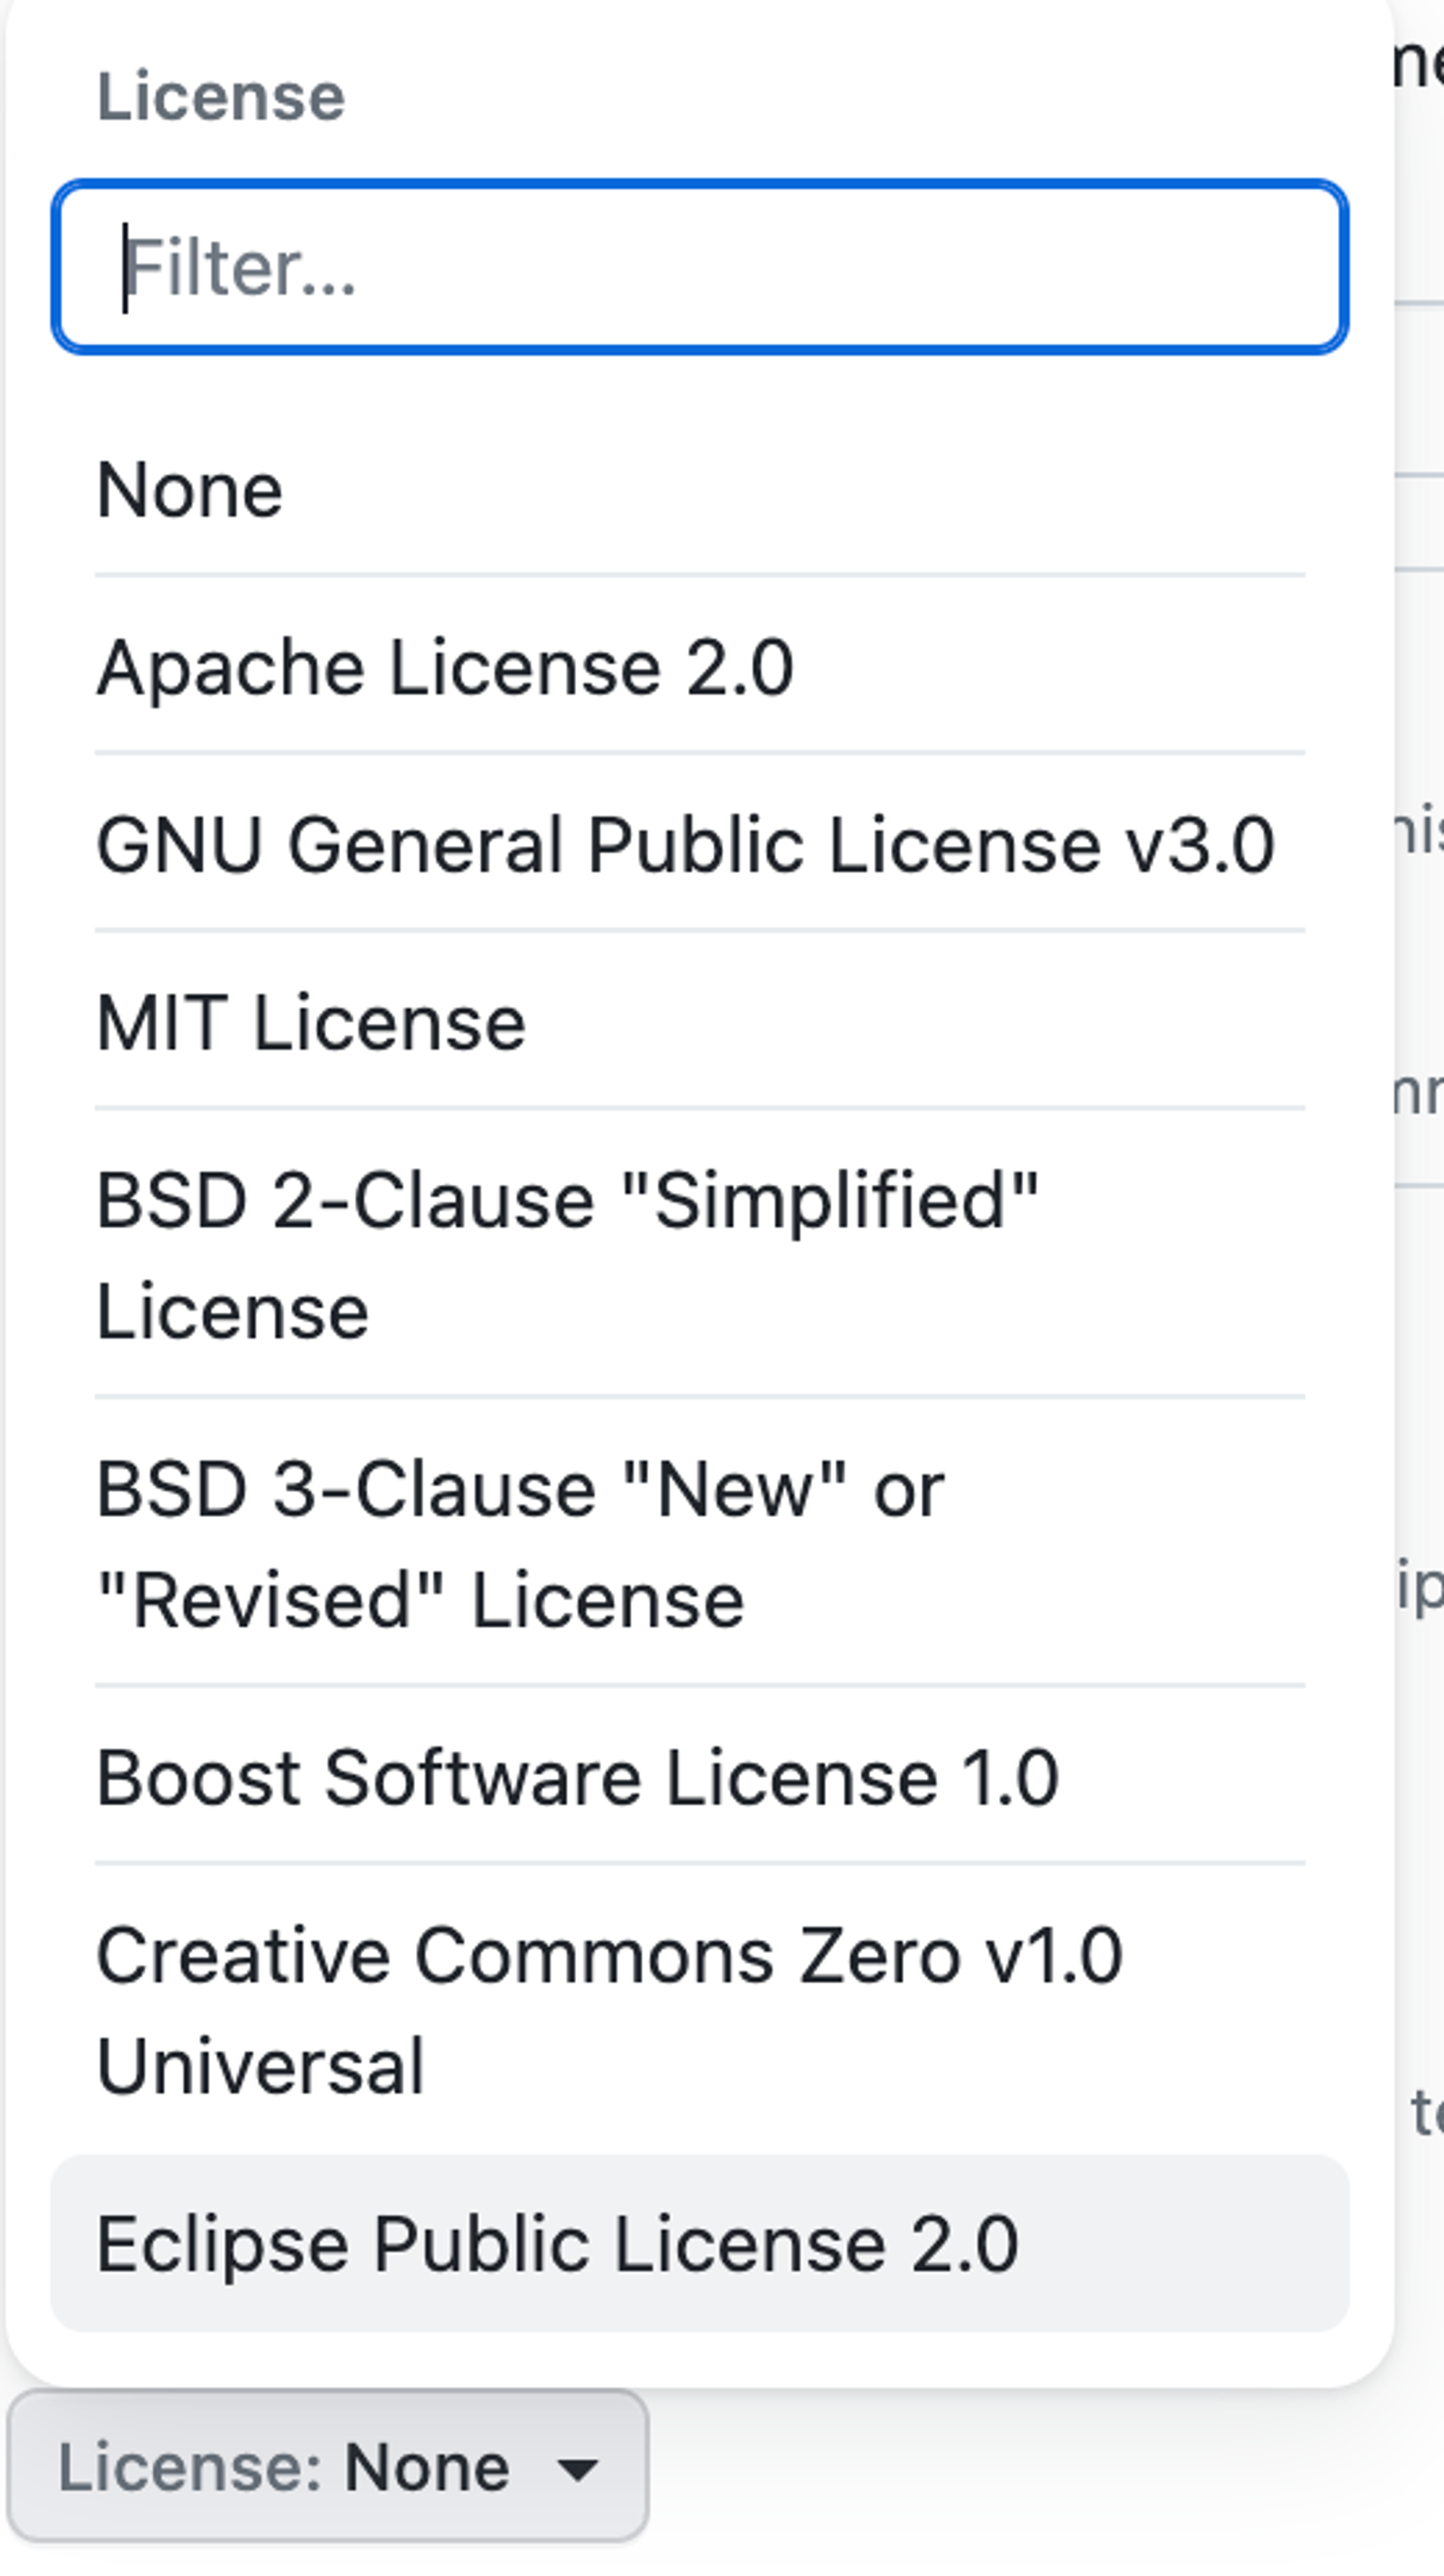
Or if you are unsure which one to use you can visit https://choosealicense.com/ that will help you in selecting a license.
For this tutorial I chose the
MIT License. The MIT License is short and to the point. It lets people do almost anything they want with your project, like making and distributing closed source versions.After you are done with your selection go ahead and click the big green button that says
“Create repository”
3. Your repository is created
Hoorah! You have successfuly created your first repository. You should be shown with a screen similar to the following:
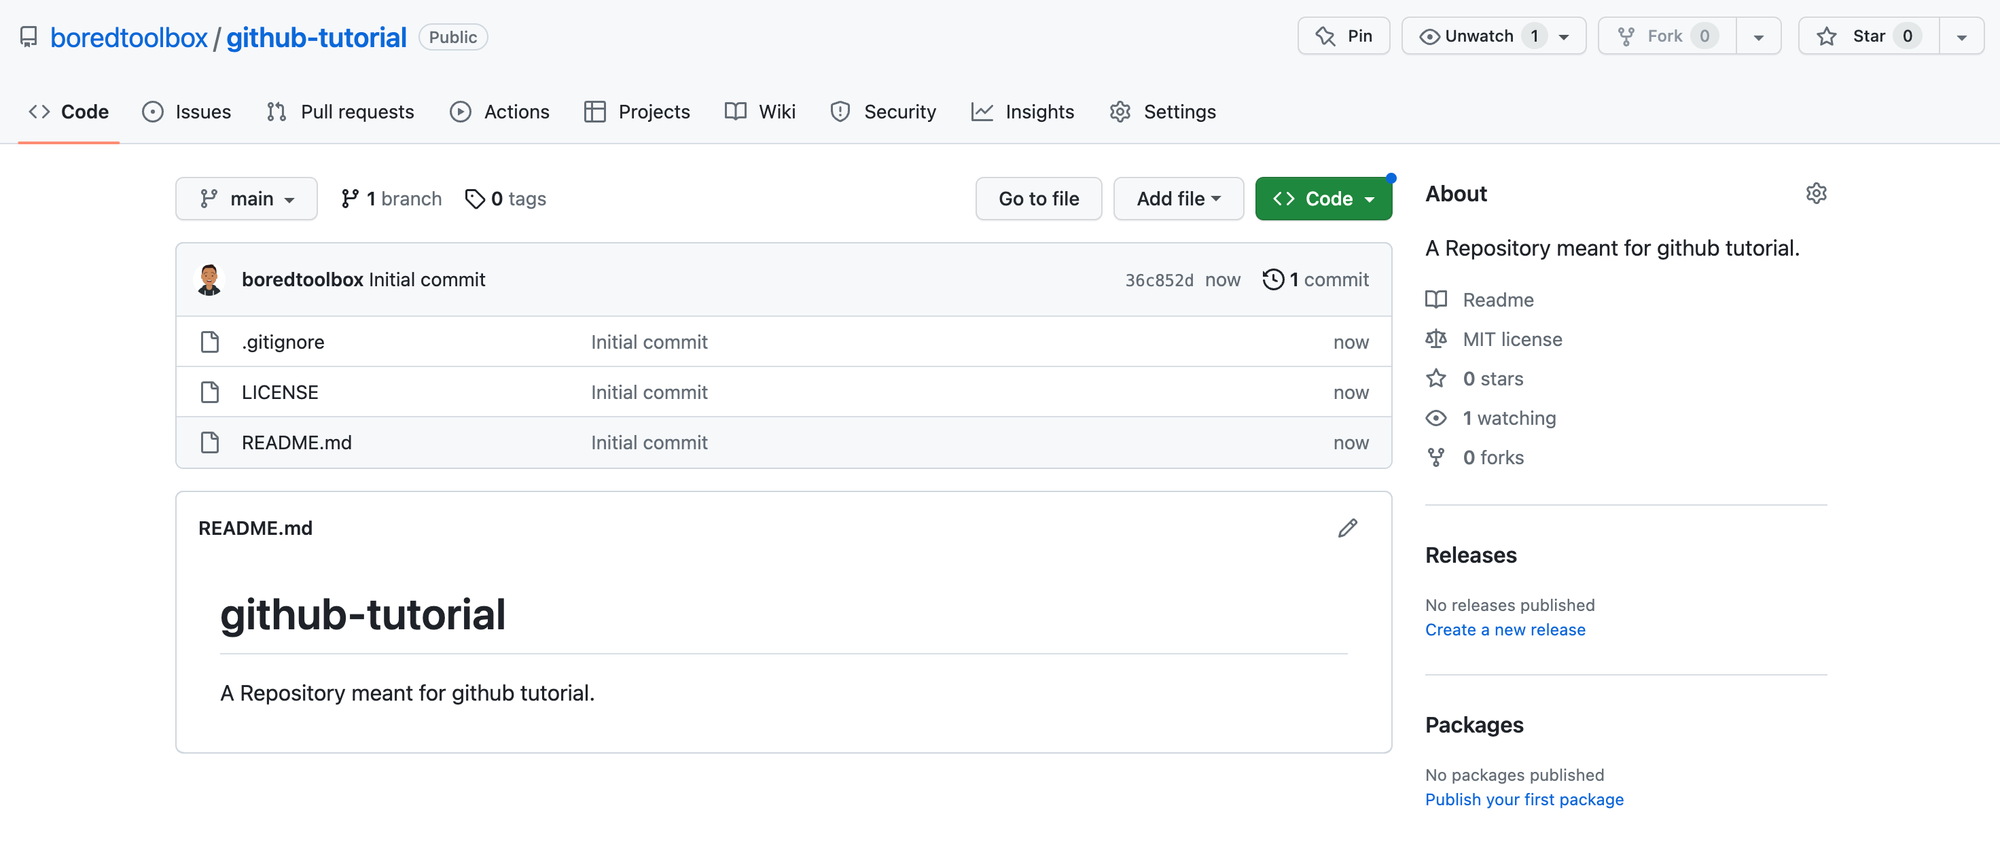
This is the home screen of your repository. If you see carefully you will notice that our repository already has 3 files in it as per our selection:
- .gitignore
- LICENSE
- A README.md that has the name of our repository and also the description that we added.
Conclusion
Check out my other blogs here ✏️


Follow, Mentoring Free (& Paid) 📞

Subscribe to my free Security Focussed Newsletter 📰
